Top Bend LED Neon Strips Manufacturer, Supplier & Factory
Unitop stands as a reputable top/vertical bend LED neon strip manufacturer in China, offering comprehensive options. Our lineup features everything from the standard 12V or 24VDC to constant voltage/constant current models, IP67 or IP68 ratings, and extensive sizes range from 0606, 1010, 1212, 1615, 2016, 3020, 5025, and D16. Customers can choose a traditional white silicone body or a black one, tailoring to diverse installation requirements.
We adhere to CE, RoHS, and UL standards, underscoring our commitment to quality and sustainability. Our Top Bend LED Neon Strips, known for their competitive pricing and quality, are a leading choice in the market. Unitop provides tailored solutions with OEM and ODM services, meeting all customer needs in LED lighting.
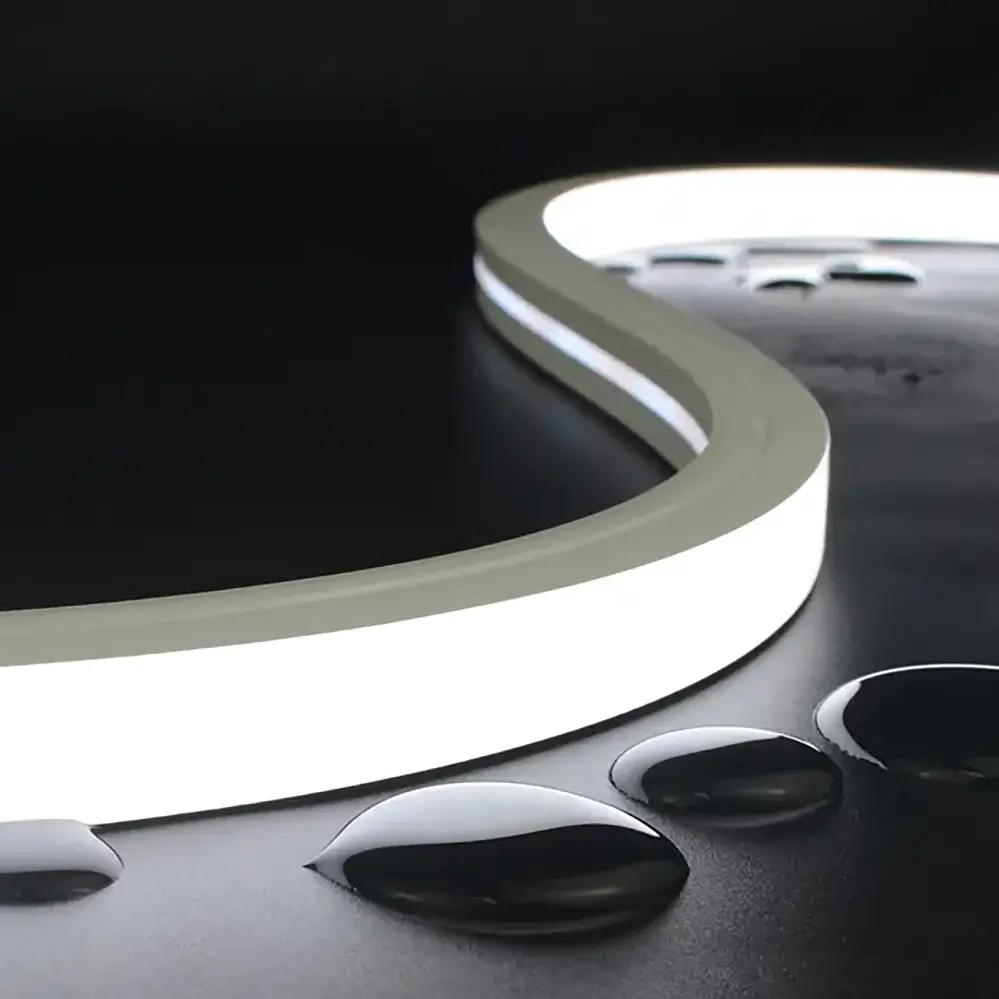
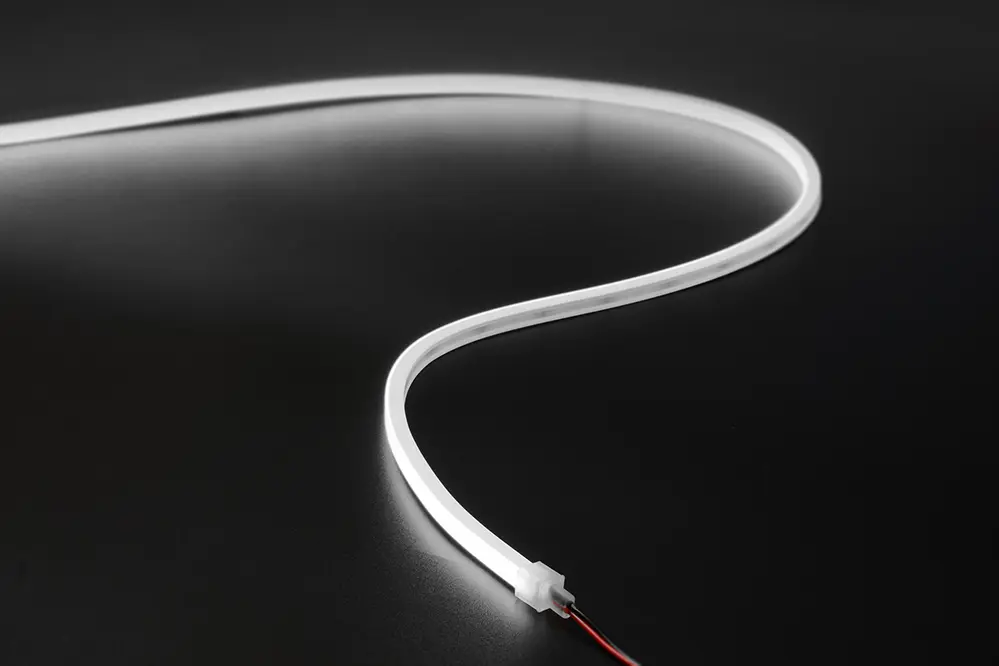
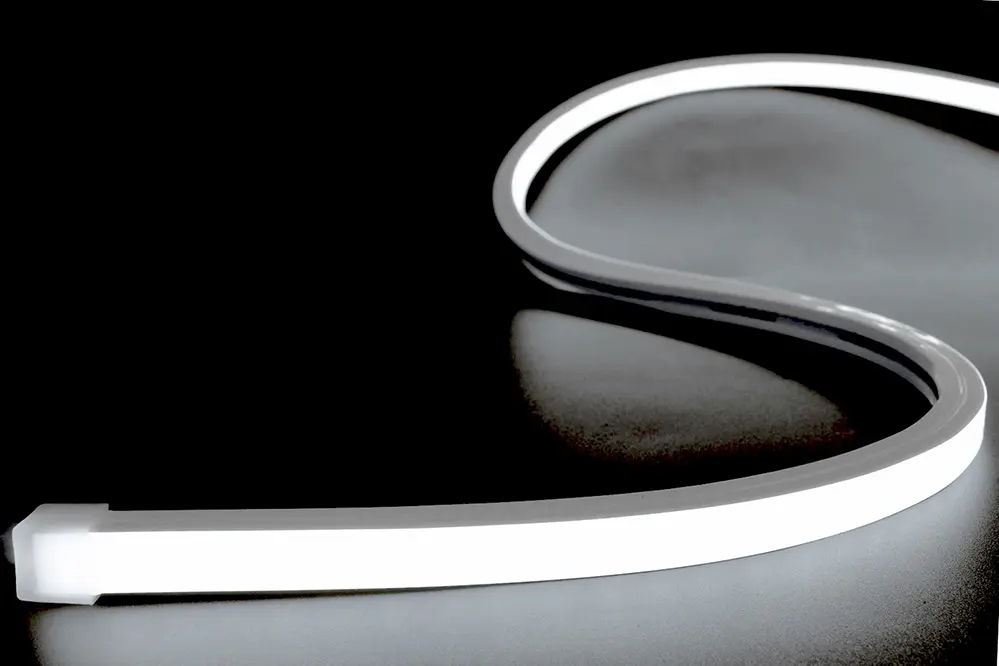
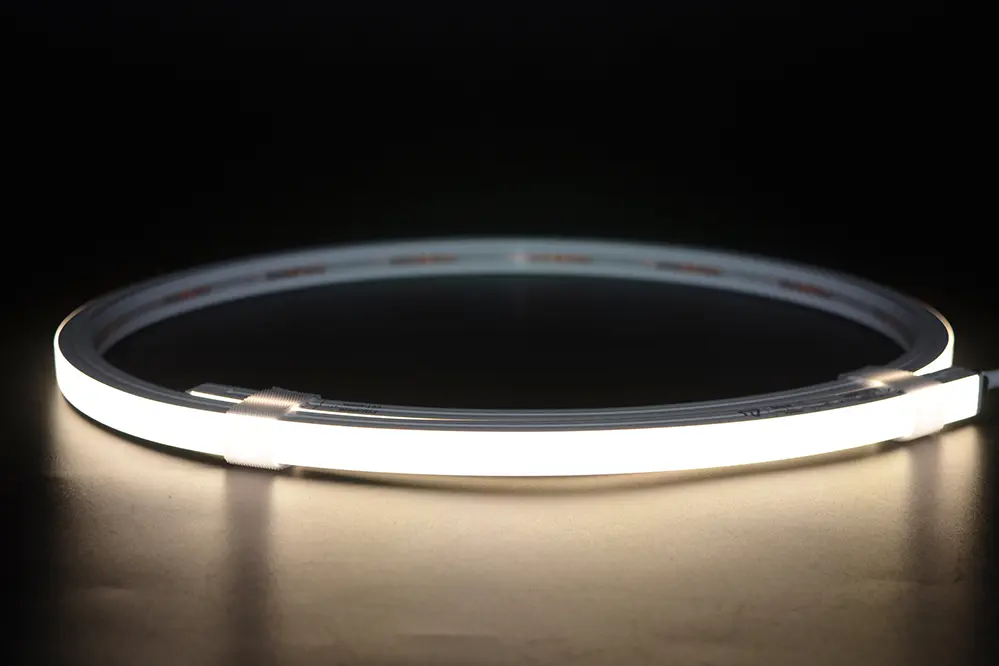
Top Bend LED Neon Strip, also known as top view or vertical bend LED neon strip, is a type of flexible LED neon strip designed to bend along the vertical axis. This design feature allows it to be shaped and contoured in ways that traditional neon lighting can’t, making it highly suitable for custom signage, architectural features, and decorative lighting.
Unlike traditional glass neon tubes, these LED neon strips are typically made from durable, flexible silicone materials. This construction allows for safe and easy installation in various indoor and outdoor settings. The top bend capability refers explicitly to the strip’s ability to bend upwards or downwards (like a “smile” or “frown”) as opposed to bending side to side.
These strips usually come in various colors, voltages, and levels of water resistance (indicated by IP ratings like IP67 or IP68). They can be cut to length and connected to a power supply, making them versatile for different projects. The LED technology also makes them more energy-efficient, longer-lasting, and less prone to breakage than traditional neon lighting.
Wholesale Unitop Top Bend LED Neon Strips
Durable, Bright, Elegant: Unitop’s Top Bend LED Neon Strips Unveiled
What Sets Unitop’s Top Bend LED Neon Strips Apart? Exceptional Quality and Versatility
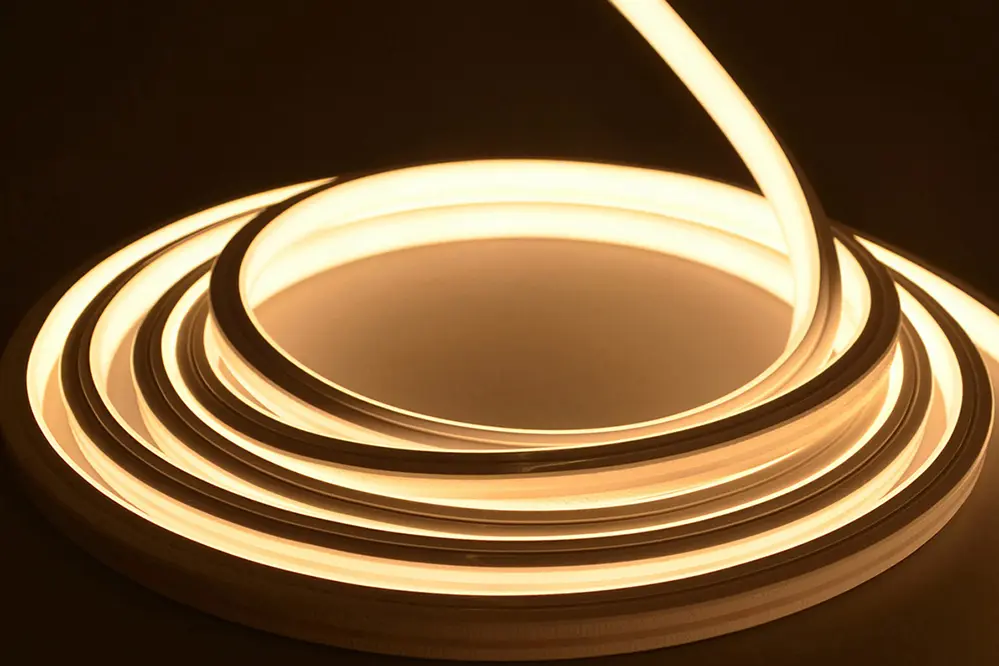
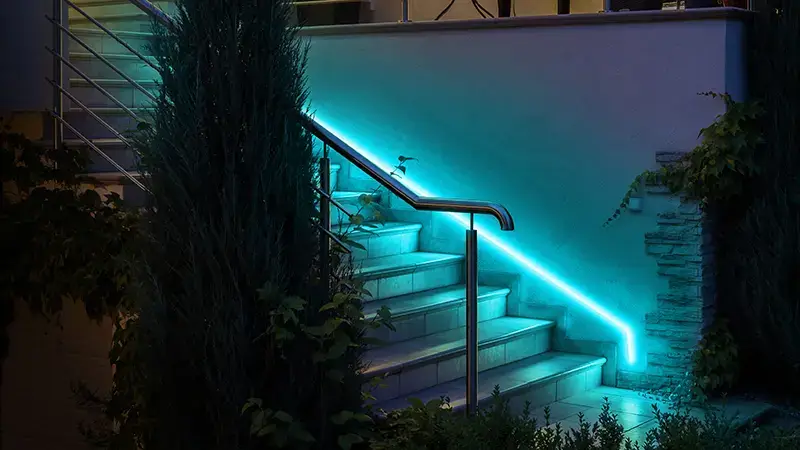
Vertical Flexibility
Top bend LED neon flex can bend vertically, allowing for unique designs and shapes that traditional LED strips can’t achieve. This feature is ideal for creating curves, waves, and other intricate patterns in lighting designs.
Made from quality silicone from Dow Corning from US, these neon strips are more durable and safer than traditional glass neon. They are less prone to breakage and don’t get as hot, reducing the risk of injury and damage.
1. Resistance to Saline Solutions: It withstands exposure to saltwater environments. 2. Acid & Alkali Resistance: Maintains integrity when exposed to acidic or basic substances. 3. Resistance to Corrosive Gases: Durable in environments with harsh gases. 4. Fire Resistance: Offers a degree of fire retardancy. 5. UV Resistance: Withstands ultraviolet light without degrading.
Three-color Silicone Extrusion
Fully-automatic three-color silicone extrusion process further improves the reliability of the strips.
Anti-breakage Sheet Down The Strips
In the extrusion process, we have put an anti-breakage sheet down the LED strip. This will prevent LED strips from breaking down.
Energy Efficiency and Long Lifespan
LED technology consumes significantly less energy than traditional neon lighting, lowering electricity bills and reducing carbon footprint. LEDs have a longer lifespan than traditional neon tubes, often lasting tens of thousands of hours, which reduces the need for frequent replacements and maintenance.
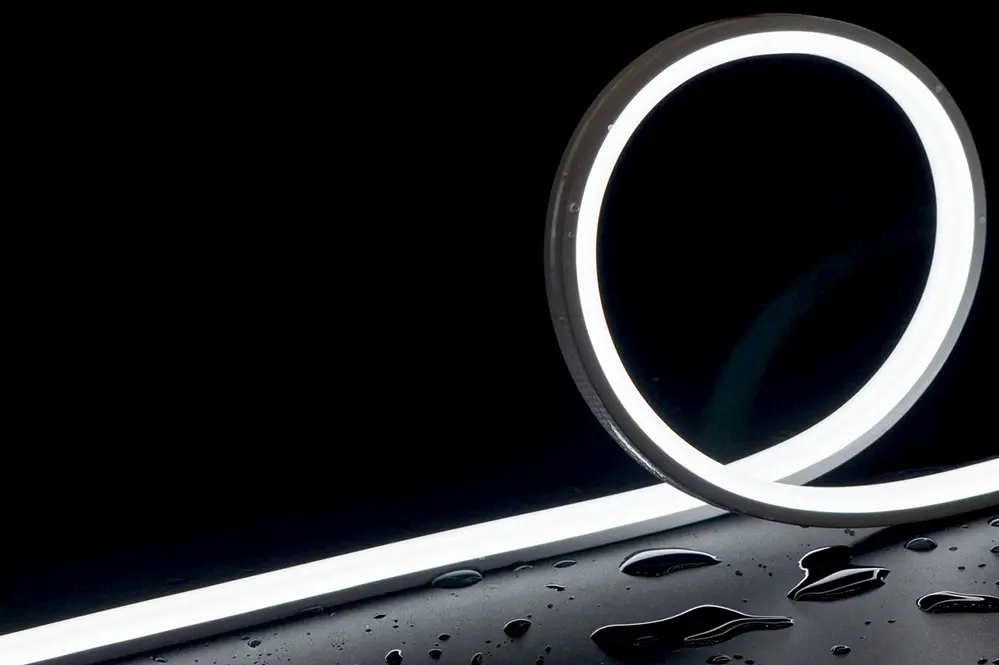
Water and Weather Resistance
With high IP ratings like IP67 or IP68, top bend LED neon flex is resistant to water and weather conditions, making it suitable for both indoor and outdoor applications.
Color Variety and Control
They come in various colors, including white, tunable white, RGB, RGBW options, offering flexibility in design and the ability to create dynamic, multi-colored lighting effects controlled via remote or controller.
Top Bend LED Neon Strip Applications
Witness the Versatility of Top Bend LED Neon Strips in Various Applications
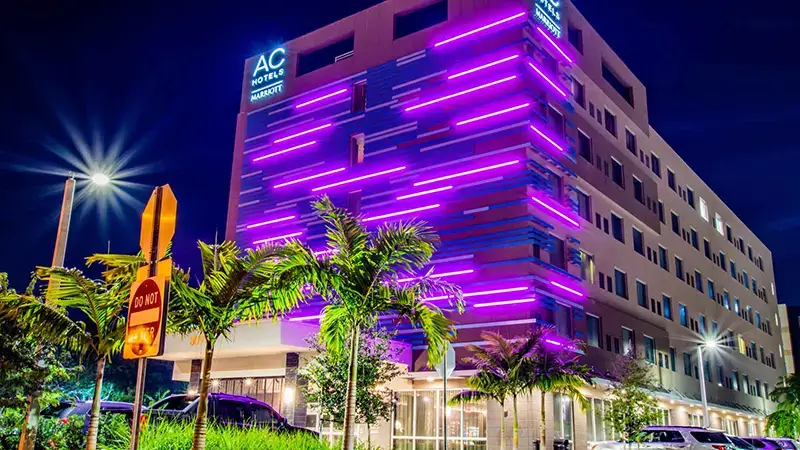
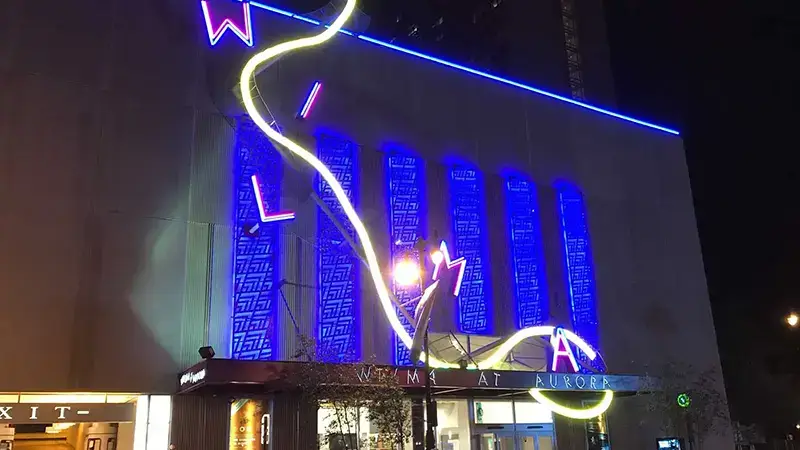
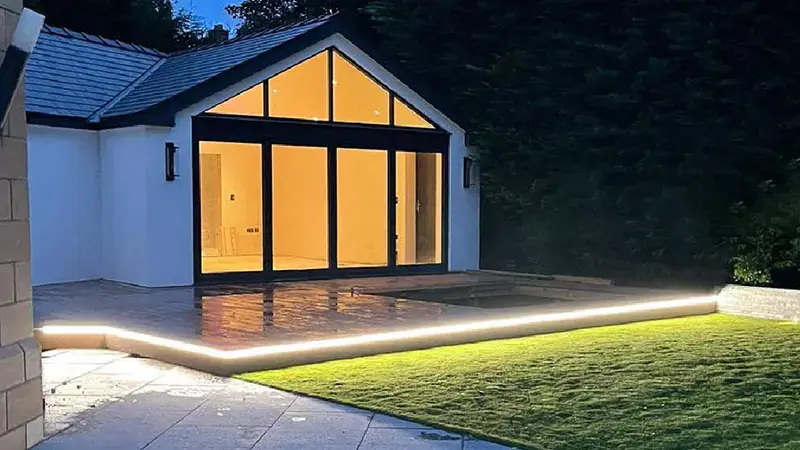
Illuminating Architectural Marvels
Architectural lighting takes a dynamic turn with Top Bend LED Neon Strips. These strips are not just about illumination; they redefine buildings' facades, accentuating their features with vibrant colors and subtle glows. Picture a historic monument bathed in a soft neon glow or a modern skyscraper outlined against the night sky. These strips offer architects and designers the flexibility to create mood, highlight architectural details, and enhance the overall aesthetic of buildings. The result? Structures that don't just stand out; they tell a story.
Revolutionizing Retail Displays
In the competitive world of retail, presentation is everything. Top Bend LED Neon Strips offer a game-changing tool for retailers. These strips transform ordinary shelves and windows into eye-catching displays, drawing customers' attention and enhancing the shopping experience. Whether highlighting the latest fashion trends or creating an inviting ambiance, these LED strips add a touch of sophistication and style to any retail setup. They're not just lighting up products but elevating them to art.
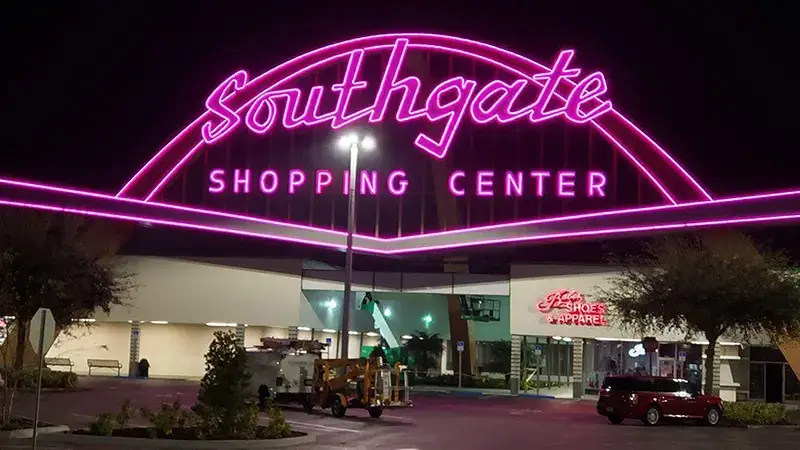
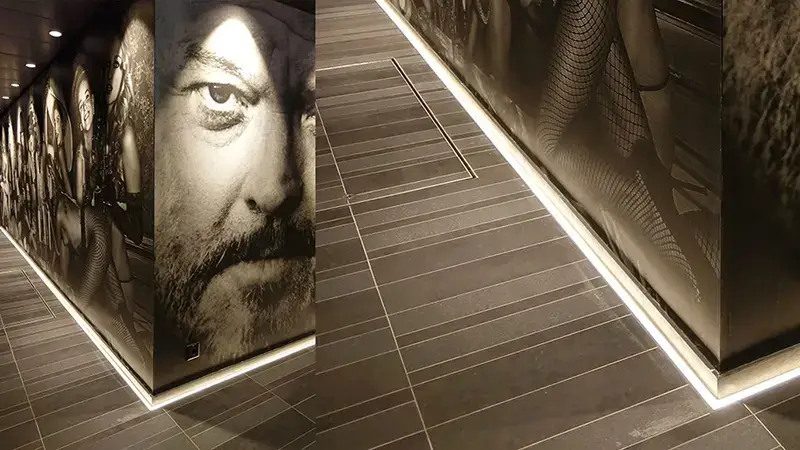
Creating Art with Light in Exhibits and Signage
Exhibit lighting and signage are about capturing attention and conveying messages. Top Bend LED Neon Strips are perfect for these applications, offering bright, consistent lighting that makes every sign and exhibit pop. From museum displays that require delicate, focused lighting to bold, attention-grabbing storefront signs, these strips are as versatile as they are vibrant. They are the artist's brush for the canvas of public spaces, turning everyday signs into light art pieces.
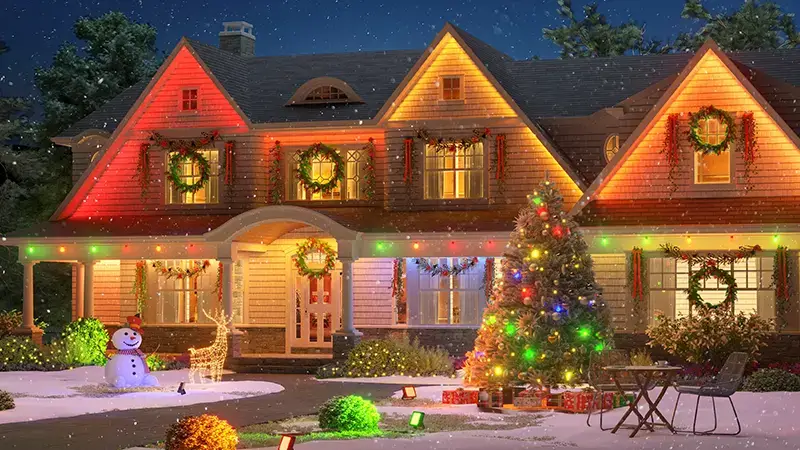
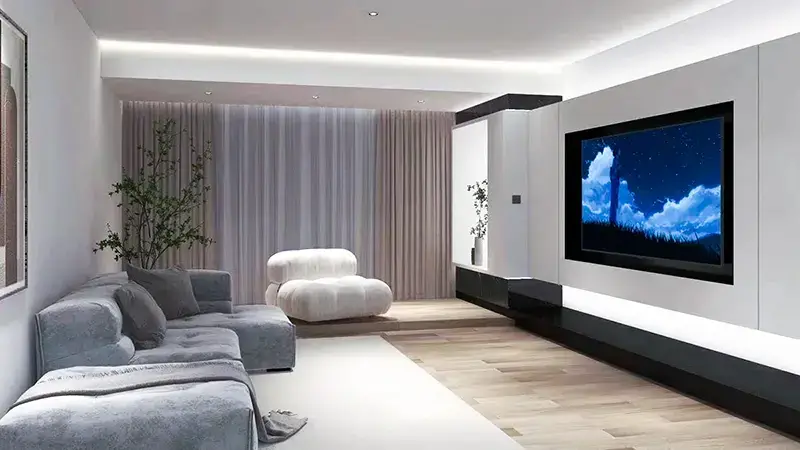
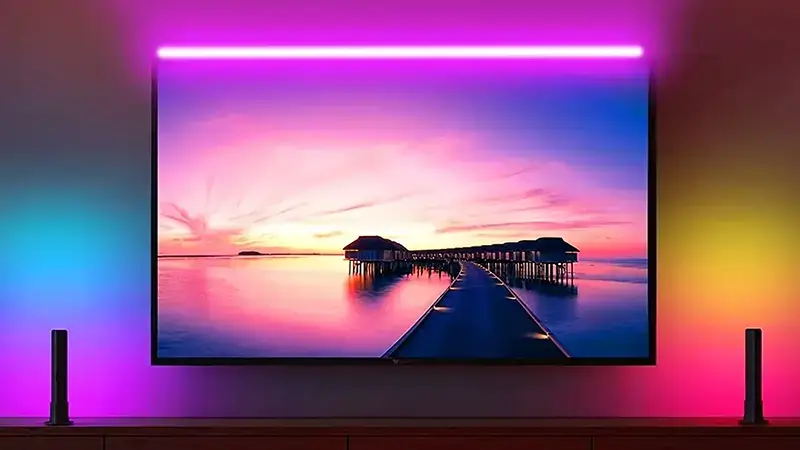
Enhancing Home Ambiance
Transform your home into a beacon of comfort and style with Top Bend LED Neon Strips. These flexible strips illuminate homes in a functional and aesthetically pleasing way. Imagine a living room softly lit with these neon strips, creating a warm, inviting space for family gatherings. Or a backyard patio coming alive at night with subtle, ambient lighting. These strips are not just about lighting up areas but about enriching everyday living experiences at home.
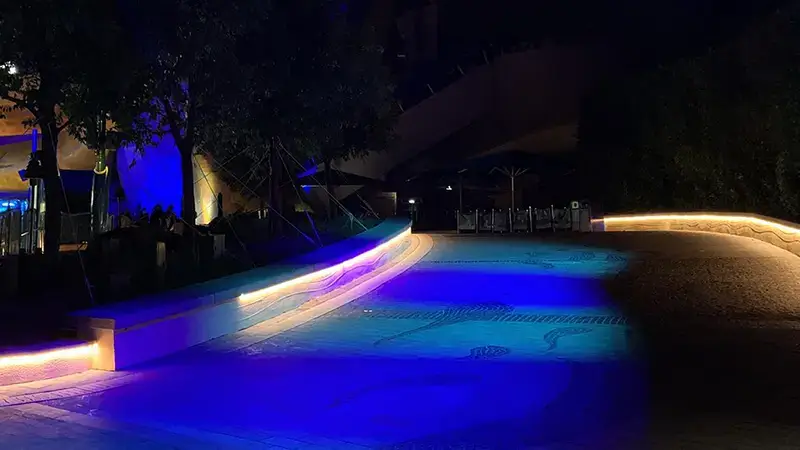
Setting the Scene for Special Events
Special events call for extraordinary lighting, and Top Bend LED Neon Strips deliver just that. You can use these strips from weddings to corporate galas to create a mesmerizing setting. They can line walkways, highlight stages, or create an immersive experience in a party venue. The ability of these LED strips to transform an ordinary space into an extraordinary one is unmatched. They're not just lighting up events; they're creating unforgettable atmospheres.
Bulk Purchases Made Easy with Unitop: Exceeding Expectations with Our Strips
Superior Expertise
Harnessing 18 years LED lighting industry for unparalleled quality.
Quality Assurance
A notable 3~5 years warranty underlining our commitment to quality.
Innovative R&D
Strong professional R&D team fosters continuous product innovation.
OEM and ODM
Tailored customized solutions to meet all your unique project requirements
Robust Production
Advanced systems produce up to 1.5 million meters of LED strips monthly
Flexible MOQ
Embrace small orders & support businesses from small beginnings.
Global Assistance
Providing 12x7 worldwide support for all before or after-sales queries.
Eco-friendliness
Sustainable, biodegradable materials for eco-friendly production.
LED Neon Strips Production Process
Excellence in Manufacturing: Crafting Perfection in Every Product
Step 1: Precision Solder Paste Application on PCB
Precise lengths of PCB sheets, typically 0.5m, are aligned under a durable stainless steel stencil. Here, lead-free solder paste is meticulously applied to create perfect soldering pads, a process adaptable for both automated large orders and manual small-scale production. A meticulous quality control process ensures optimal solder paste distribution at every solder point.
Step 2: Accurate SMT Components Placement
Each PCB sheet is then processed through an advanced SMT machine, which places components with exceptional precision. This step is critical for ensuring the flawless functionality of the LED neon strips, with each solder point receiving careful alignment and pressure. A thorough quality inspection follows, addressing any component misplacements.
Step 3: Reflow Soldering for Component Security
The next stage solidifies the components onto the PCB, which is achieved through a controlled reflow soldering process. The PCBs pass through a multi-zoned reflow oven, ensuring the solder paste solidifies effectively. The LED functionality is rigorously inspected post-soldering, with any non-conforming PCBs undergoing rework or manual adjustments.
Step 4: Assembling Long LED Strips
Subsequently, the 0.5m PCB sheets are skillfully joined to create continuous 5-meter LED neon strips. Each strip undergoes stringent quality checks, including a comprehensive 12-hour burn-in test, ensuring consistent lighting quality and longevity.
Step 5: Colorful Silicone Mixing
To enhance the aesthetic appeal of LED neon strips, high-quality silicone is mixed to produce various hues, such as milky white for light diffusion, white for light blocking, and transparent for marking cutting positions. The diffusion powder's proportion directly influences the color intensity and light transmission.
Step 6: LED Strip Installation and Precision Adjustment
The LED strips are carefully placed on a payoff frame and meticulously adjusted on an alignment table, ensuring perfect organization and set up for the extrusion process.
Step 7: Advanced Silicone Wrapping with Electronic Control
This innovative step combines LED strips with silicone through a precise die and electronic control mechanism, ensuring seamless and uniform silicone wrapping around the LED strip.
Step 8: Vulcanization and Oven Shaping
The silicone-wrapped LED strips undergo vulcanization in a specialized oven, ensuring they are appropriately shaped and cured without damaging the LED beads.
Step 9: Custom Cable Soldering and End Cap Installation
Tailoring to diverse customer needs, various cable lengths and entry points are soldered onto the LED neon strips, with appropriate end caps installed for waterproofing.
Step 10: Comprehensive Quality Inspection
Each LED neon light undergoes extensive testing, covering brightness, electrical performance, durability, waterproofing, temperature resistance, aesthetics, safety compliance, and specific performance benchmarks, ensuring each product meets the highest quality standards.
Step 11: Personalized Laser Engraving
As part of our OEM/ODM services, we offer customized laser engraving on the silicone body of the LED neon strips, including brand logos and product information.
Step 12: Secure Product Packaging
Finally, the LED neon strips are carefully rolled, packaged in anti-static bags or custom packaging as per client requirements, and securely placed in cartons for shipping.
DIY Guide to Cut and Connect LED Neon Strip
Learn the Essentials of LED Neon Strip Installation With Our Easy-to-follow, Professional Guide.
Cut & Connect by Soldering
Step 1: Cutting LED Neon Strip
1. Preparation: Align your scissors at a precise 90-degree angle. 2. Positioning: Place the LED Neon Strip flat against the scissors. 3. Execution: Locate the designated cutting mark and execute a clean, straight cut. Reminder: Avoid diagonal cuts to ensure integrity.
Step 2: Wiring Preparation
Thread the electrical wire through the designated end cap for a secure fit.
Step 3: Soldering Process
1. Prepping the Surface: Trim excess silicone from the LED Neon Strip to reveal the soldering pad. 2. Soldering Setup: Set your soldering iron between 380-400°C. Keep the soldering duration between 3 and 5 seconds. 3. Tinning: Tinning thoroughly to the Flexible Printed Circuit (FPC) pad. 4. Connection: Carefully solder the wire to the FPC, ensuring correct polarity. Avoid exposing copper and FPC edges, and prevent scalding the wire.
Step 4: Sealing the Head End Cap
1. Glue Preparation: Cut the glue nozzle as needed. 2. Application: Apply a 1-2mm layer of glue inside the end cap and a 5-7mm circle around the neon strip’s cut end, avoiding the FPC and LEDs. 3. Assembly: Insert the LED Neon Strip into the end cap by 8-9mm, applying gentle pressure. 4. Cleanup: Remove any excess glue with a cloth.
Step 5: Sealing the Tail End Cap
Follow the same steps as for the head end cap, ensuring a secure and neat finish.
Step 6: Final Step
Allow 3 hours for initial solidification, with 24 hours for complete setting.
Cut & Connect by Solder-free End Cap
Step 1: Cutting LED Neon Strip
1. Scissor Alignment: Position your scissors perpendicular to the cutting surface. 2. Neon Strip Placement: Lay the LED Neon Strip evenly against the scissor blades. 3. Cutting Procedure: Identify the specified cutting mark and make a direct, even cut. Note: Prevent angled cuts to maintain the strip’s structural integrity.
Step 2: Installing the Head End Cap
1. Slide in the U-shape transparent connector. 2. Attach the transparent PC mounting cover. 3. Install the transparent PC anti-skipping clip. 4. Install waterproof rubber gasket to cable with connector. 5. Insert cable with connector to neon strip. 6. Put the metal blank end through the cable. 7. Fasten the metal end with four screws to the transparent PC mounting cover.
Step 3: Installing the Tail End Cap
1. Attach the transparent PC mounting cover. 2. Install the transparent PC anti-skipping clip. 3. Put the waterproof rubber gasket inside the end. 4. Put the transparent PC pad above the waterproof rubber gasket. 5. Put the metal blank end above the transparent PC pad. 6. Fasten the metal end with four screws to the transparent PC mounting cover.
Step 4: Final Step
Light on the LED neon light to check whether it is ok.
Cut & Connect by New Solder-free End Cap
Step 1: Cutting LED Neon Strip
1. Unplug & Stabilize: Safety first! Unplug your strip and choose a flat surface. 2. Sharp & Straight: Grab those sharp scissors and hold them perpendicular for straight cuts. 3. Follow the Marks: Look for cutting marks on the strip – that’s your cutting zone. 4.One Smooth Slice: Make a single, smooth cut through the mark – no angles!
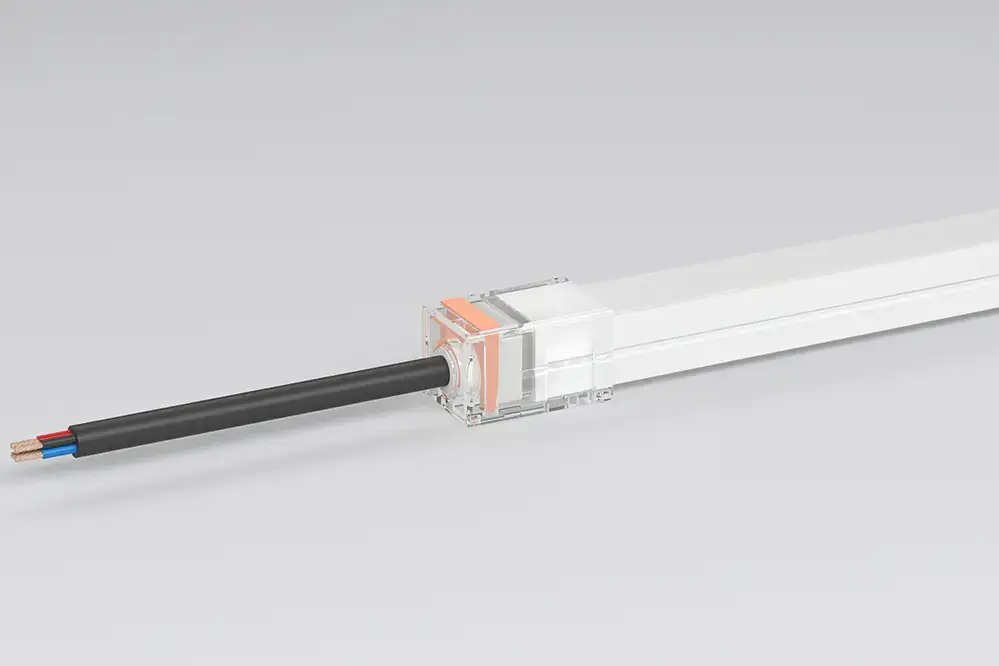
Step 2: Installing the Head End Cap
1. Slide in the U-shaped silicone shim to neon flex. 2. Attach the flat silicone shim to plug with cable. 3. Insert the plug to the silicone neon strip. 4. Passing the cable through the hole of the transparent housing. 5. Slide the transparent housing onto the neon strip. 6. Insert the transparent fastening latch to the housing. 7. Insert the orange fastening latch to the housing.
Step 3: Installing the Tail End Cap
1. Slide in the U-shaped silicone shim to neon flex. 2. Attach the flat silicone shim to plug with cable. 3. Slide the transparent housing onto the neon strip. 4. Insert the transparent fastening latch to the housing. 5. Insert the orange fastening latch to the housing.
Step 4: Final Step
Light on the LED neon light to check whether it is ok.
Step 5: How to Dissemble the End Cap
1. Use a flat-head screwdriver to lift up the transparent fastening latch. 2. Pull the transparent housing away from the LED neon strip.
Top Bend LED Neon Strips End Cap Options
Elevate Your LED: Versatile End Cap Options for Neon Strips
Silicone
This is our standard end cap made from silicone. Typically, the LED neon flex with this end cap is IP67. Usually, you can slide or fit it onto the end of the strips after applying glue inside the caps.
Integral
Being IP67, it is made of the same material as the strip itself that seamlessly integrates with the strip. It provides a more finished and cohesive look as it's designed to be part and the same size as the strip.
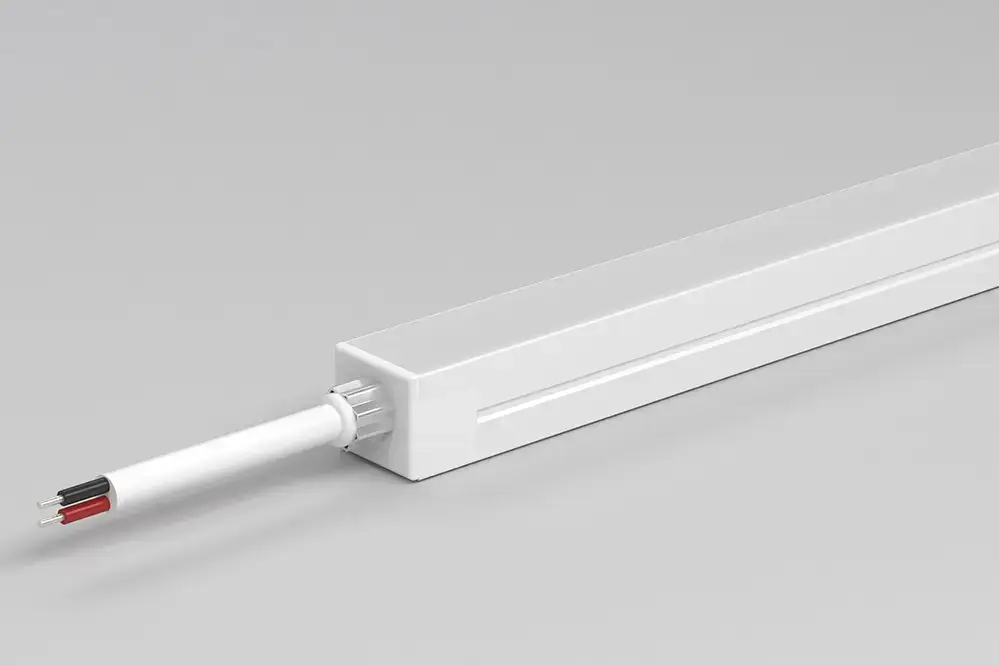
Solder-free
It is usually made of plastic or a similar sturdy material. This cap is typically IP67. It often comes with a mechanism that snaps onto the strip, making it user-friendly for quick installations.
Top Bend LED Neon Strips Cable Entry Options
Effortless Integration: Cable Entries for Enhanced Neon Flexibility
Front
The cable enters from the front or the same surface where the LED lights are visible. This type is suitable when you mount the strip against a surface and want the cables to be less noticeable from the front.
Side
The cable enters from the side of the strip. This is useful for installations where the strip is mounted along an edge or in a corner, allowing the cable to run along the side without obstructing the light or being too visible.
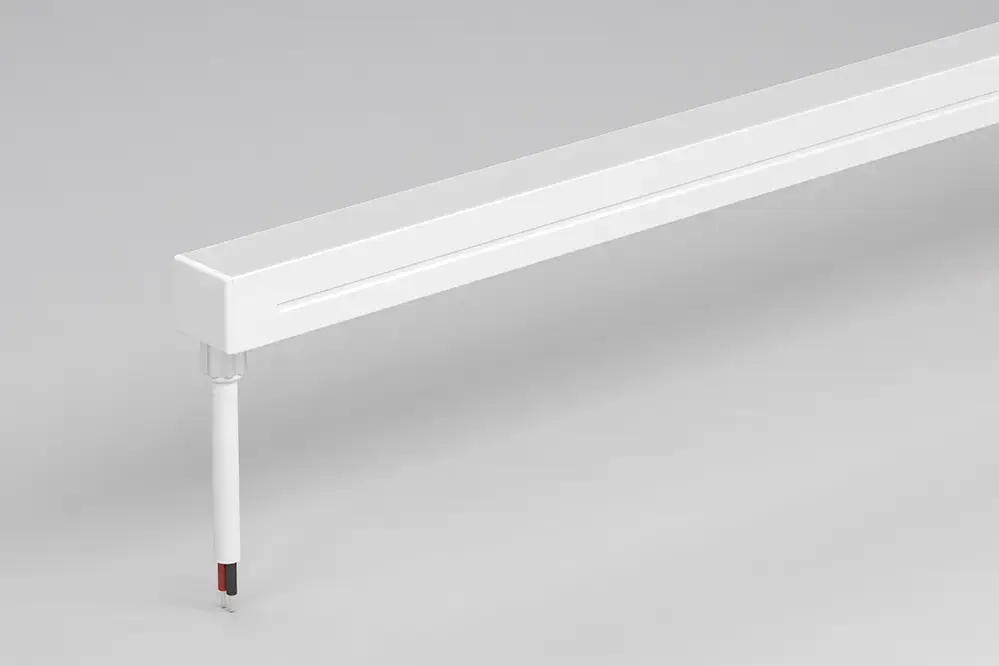
Bottom
The cable enters from the back or bottom of the strip. Ideal for overhead installations or when the strip is mounted on a surface and you want the cable to be hidden entirely from the front and sides.
Top Bend LED Neon Strips Mounting Methods
Precision Placement: Tailored Mounting Methods for Neon Flex
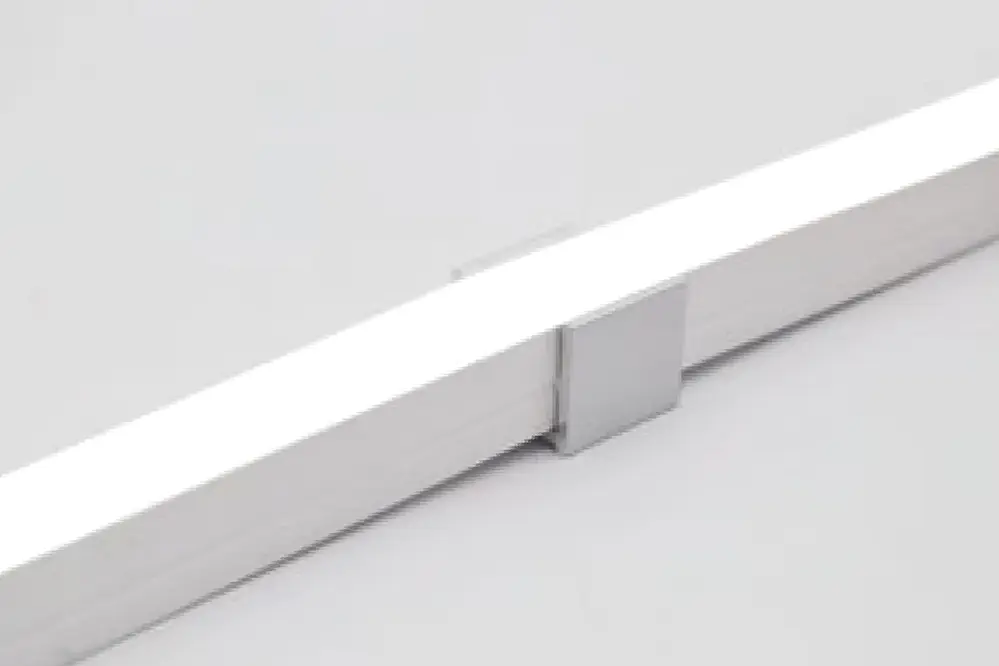
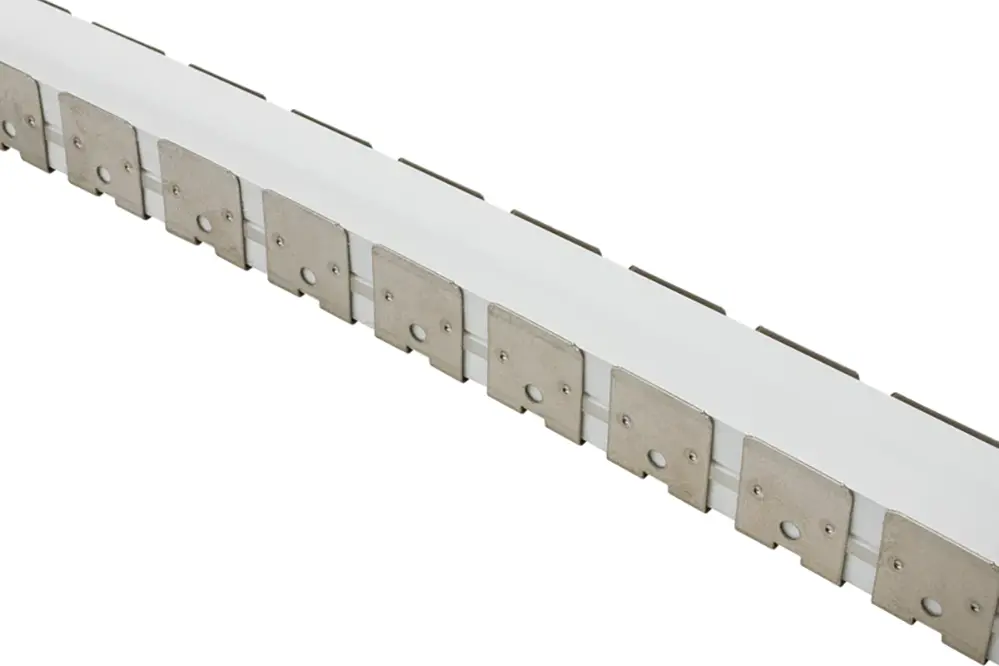
Stainless Steel Mounting Clip
After Installation
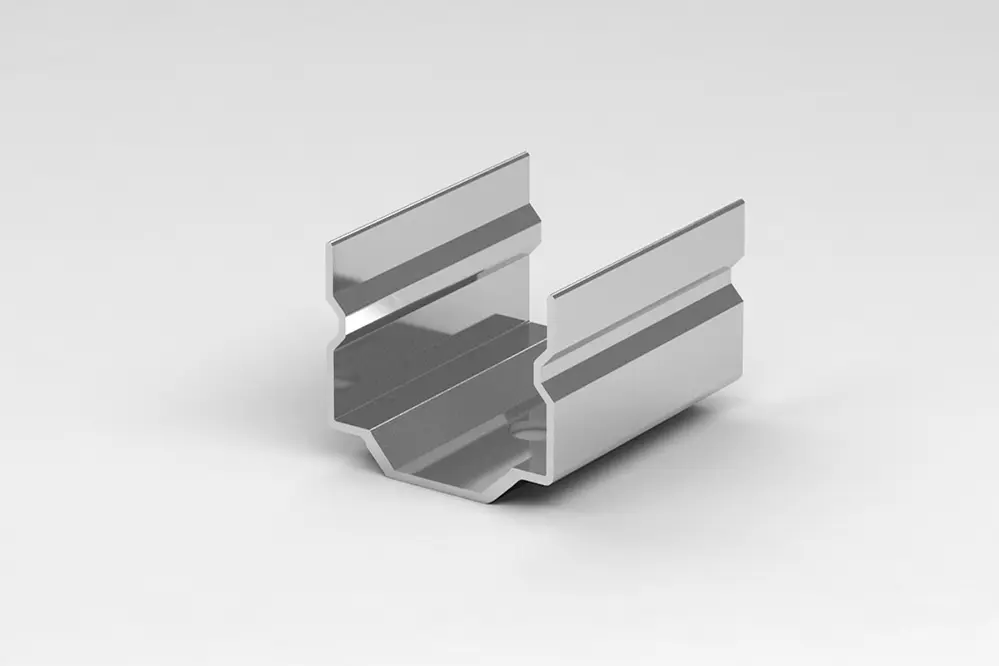
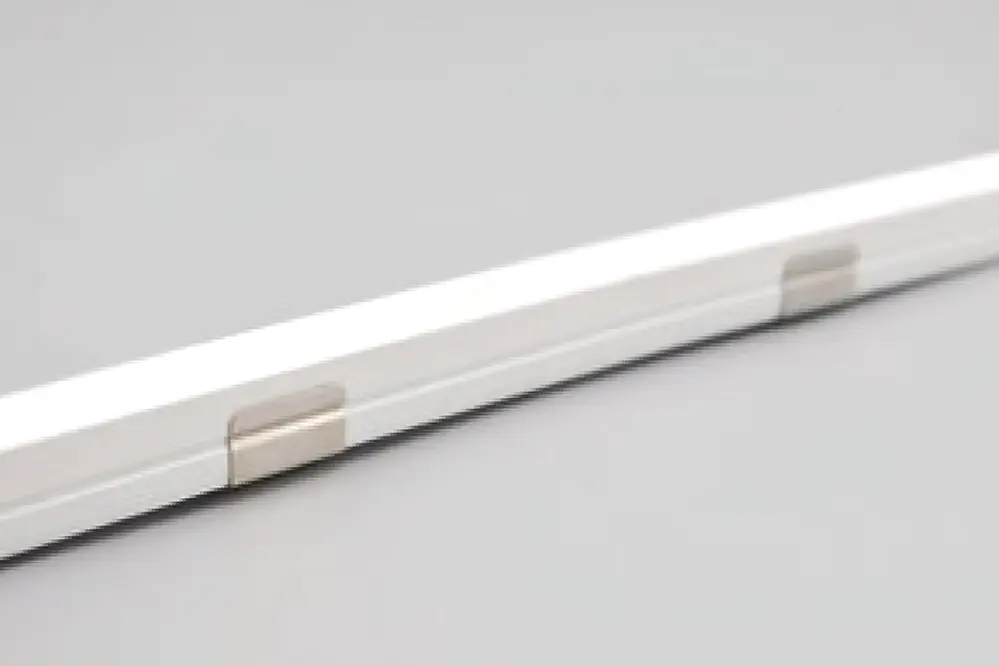
Aluminum Mounting Clip
After Installation
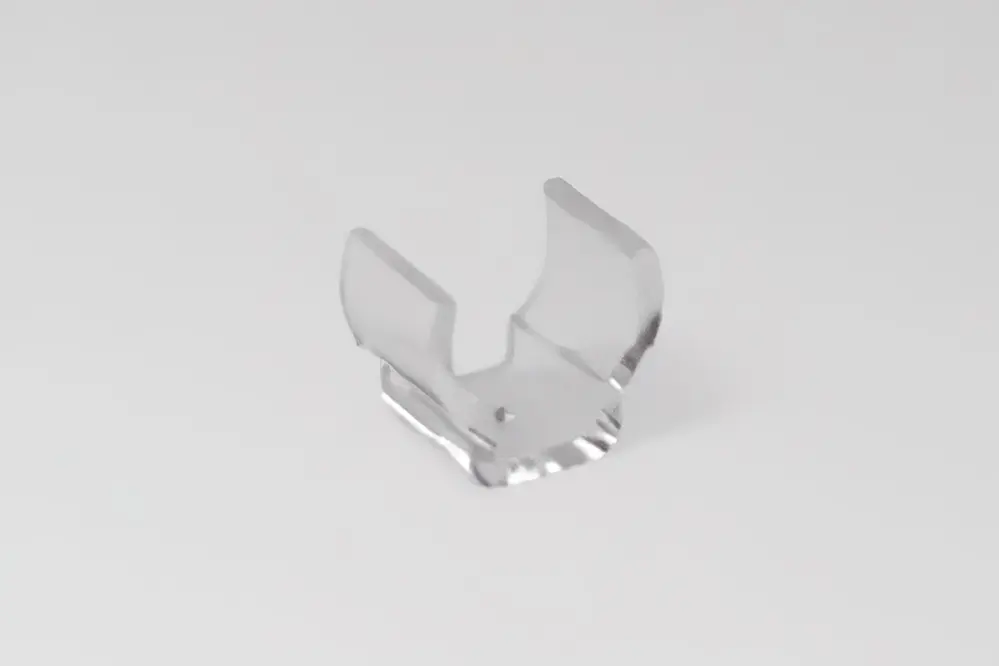
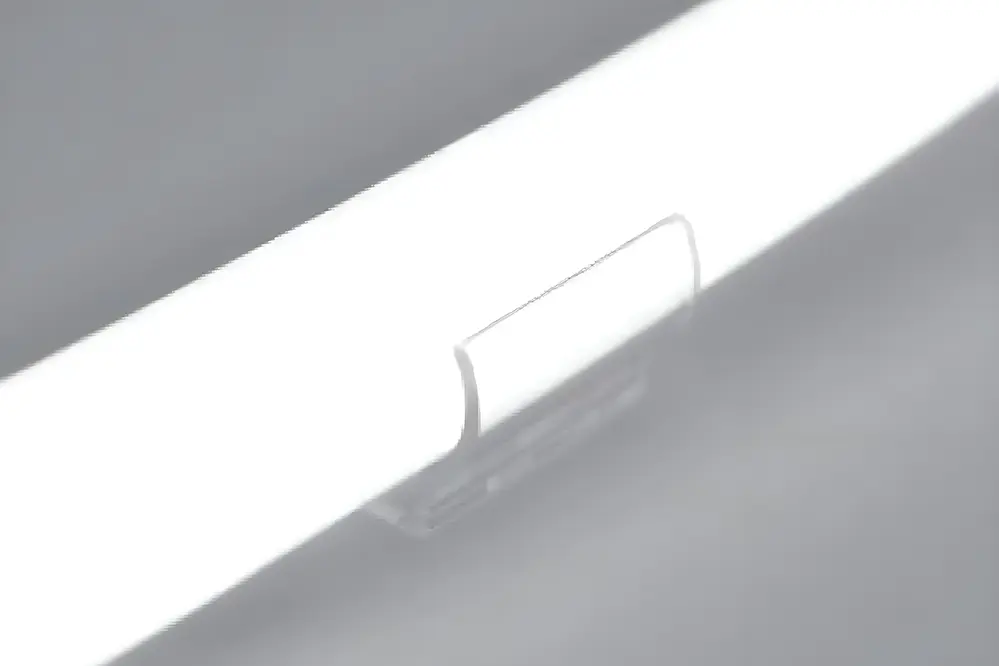
Transparent PC Clip
After Installation
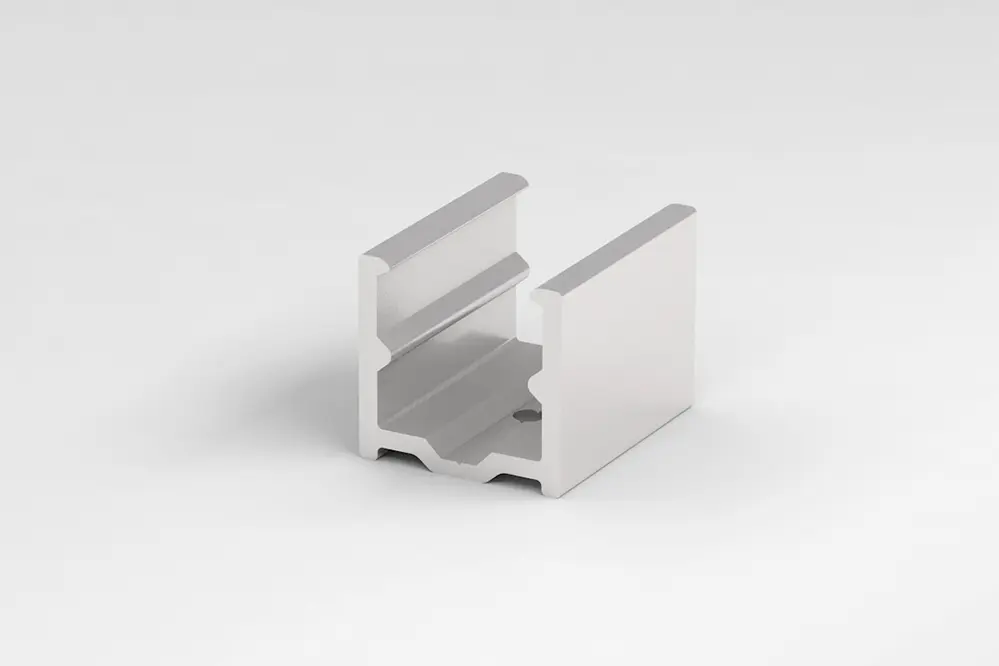
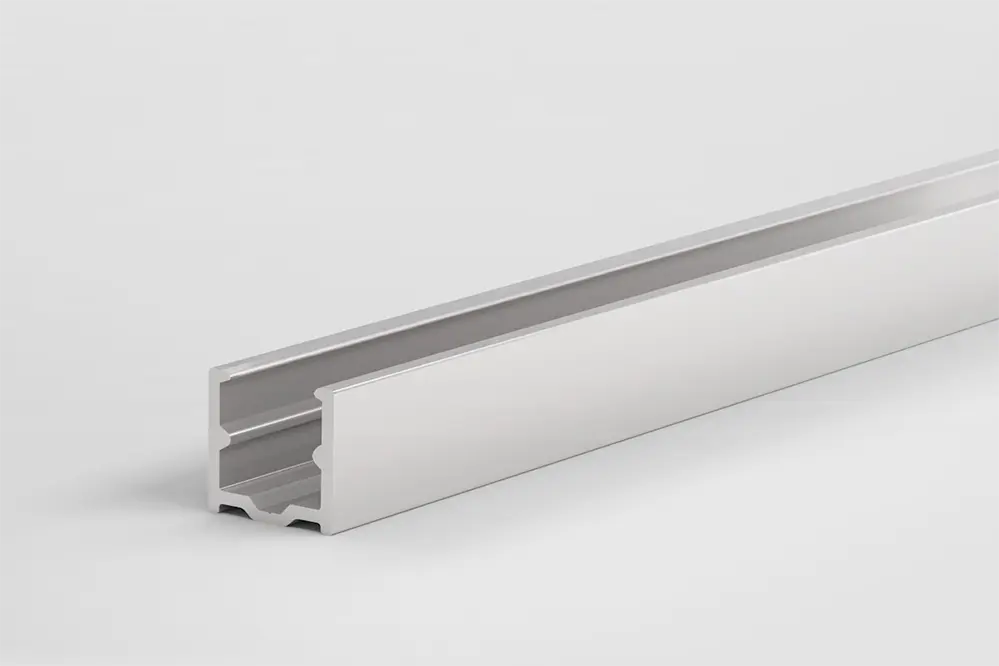
Aluminum Profile
After Installation
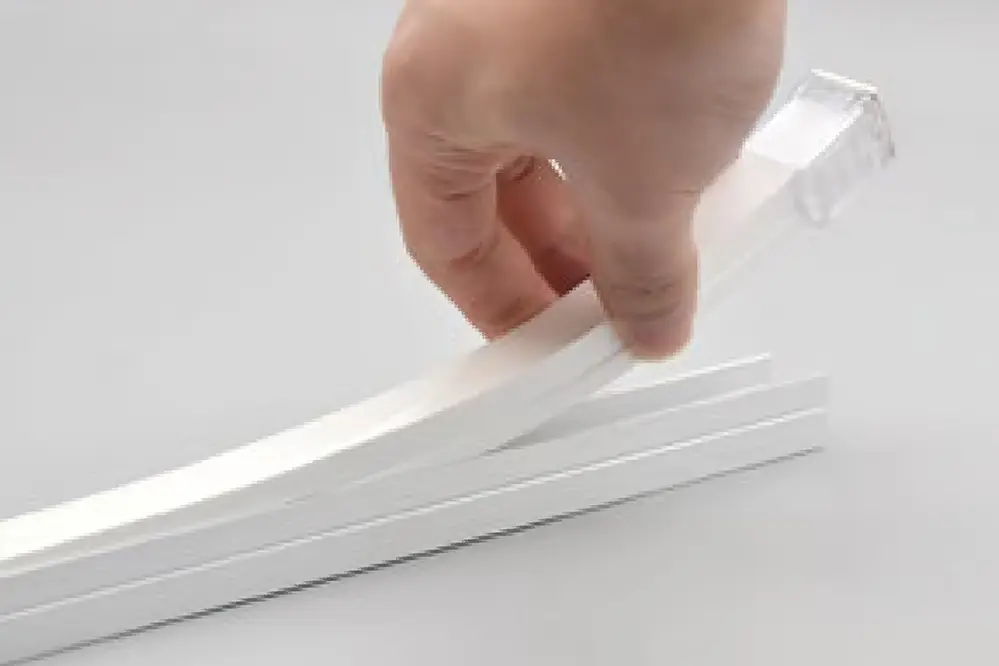
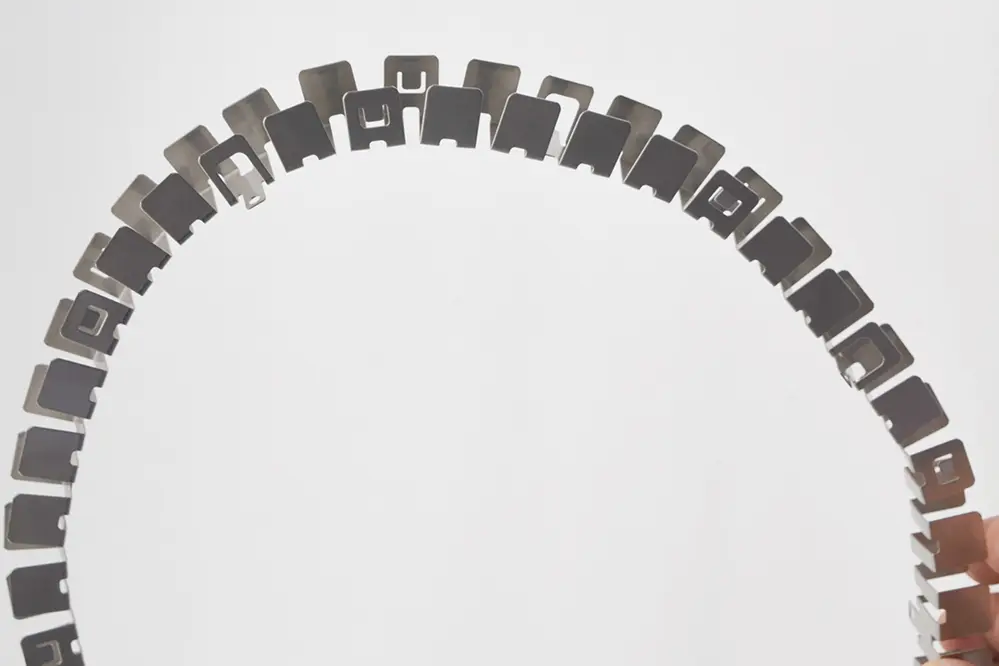
Flexible Aluminum Profile
After Installation
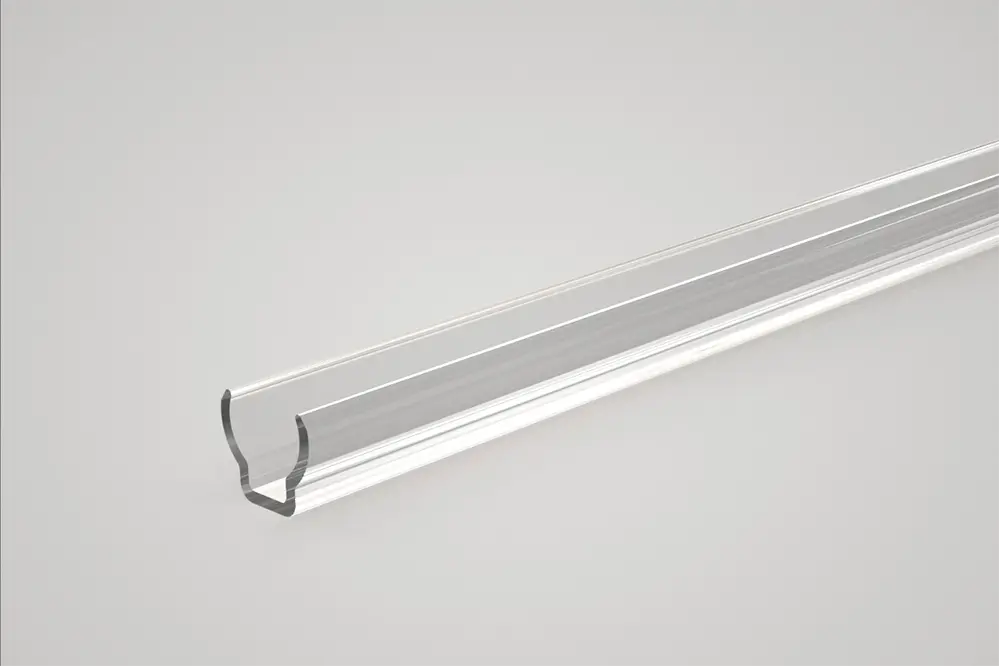
Transparent PC Profile
Normally this transparent PC profile is always used by UTNS-TBD16 Round Top Bend LED Neon Strip.
Our Certificates
Displaying a Range of Accomplishments: The Epitome of Quality, Innovation, and Excellence
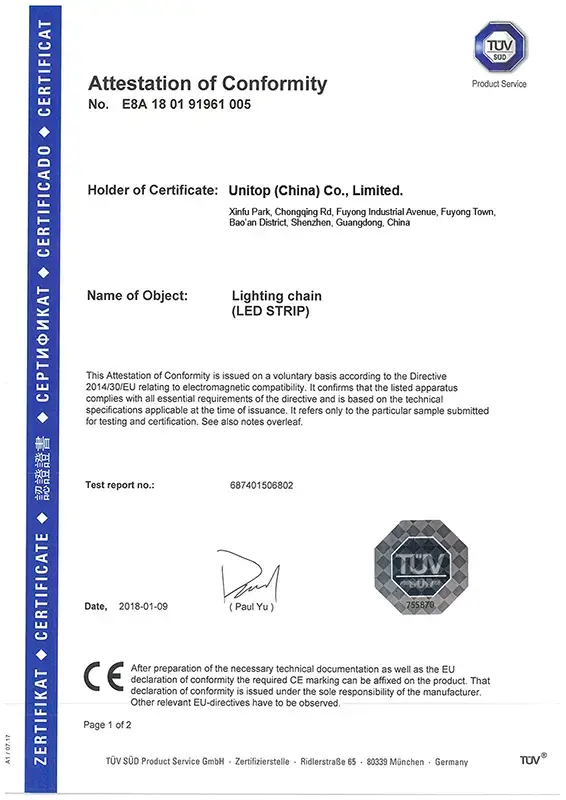
TUV/CE
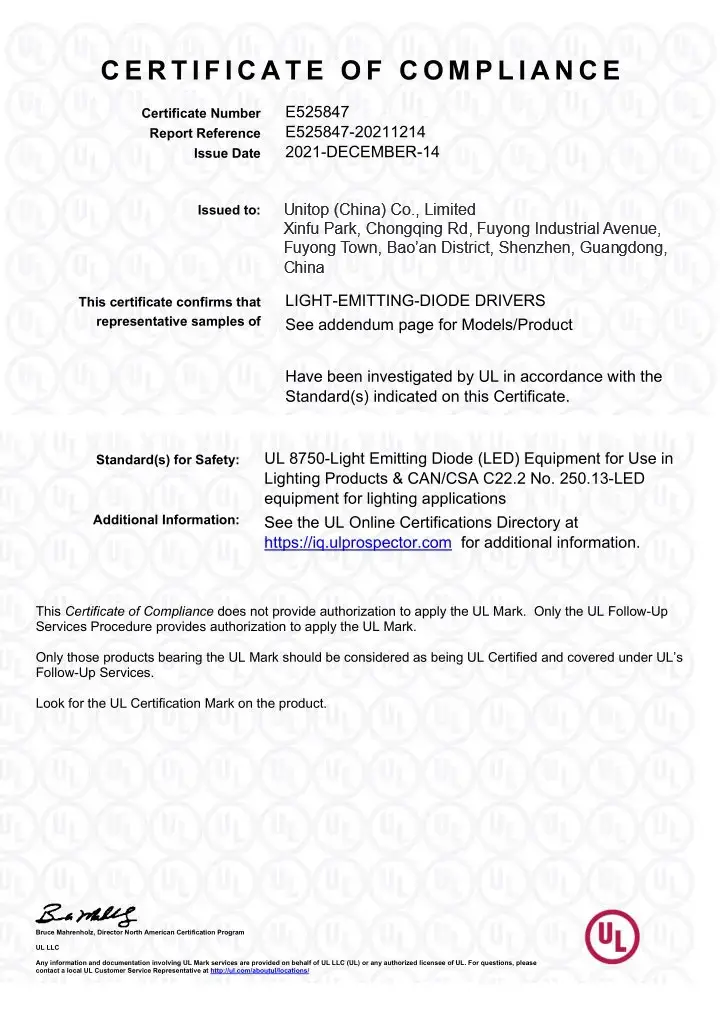
UL
LM-80
ETL
RoHS
ERP
Custom Top Bend LED Neon Strips
Illuminate on Your Terms: Personalize with Our Customizable Top Bend LED Neon Strips
Superior Material Choice
Upgrade to premium PU material over standard silicone for enhanced quality. This superior option ensures durability and aesthetic appeal, perfect for projects requiring a touch of class and longevity.
Tailored Dimensions
Don't be limited by standard sizes. We offer customized dimensions to fit your unique requirements. Just specify your desired size, and we'll design and manufacture it specifically for you, ensuring a perfect fit for any project.
LED Variety for Perfect Ambiance
Choose from a wide range of LED options, including different brightness levels and Color Rendering Index (CRI) values. Customize to create the desired atmosphere and lighting effect in any space, be it warm or bright.
Flexible Power Selection
Pick from various voltage options like 12V or 24V and wattages ranging from 5W/m to 15W/m. This selection caters to diverse energy needs and lighting intensities, ensuring your lighting is just right.
Pre-Cut Convenience
We offer neon strips cut to your specified lengths, along with cables, ready for immediate installation. This service eliminates onsite cutting, making setup quick and hassle-free.
Diverse IP Ratings
Choose from IP65, IP67, and IP68 ratings for your LED neon strips, offering protection from moisture and dust. These options ensure the lights suit various environments, from slightly damp to fully submerged.
Endcap Options for a Sleek Finish
Our selection of endcaps, including Silicone, Solder-free, and Seamless Mold Injection types, provides a neat and professional finish to your LED installations, enhancing the overall look.
Customizable Cable Outlets
Tailor your installation with different cable outlet choices - top, side, or bottom entry. This adaptability allows for seamless integration into any design or space layout.
Innovative Mounting Solutions
Utilize our mounting accessories, such as clips, aluminum profiles, and bendable channels. These options offer creative and effective ways to install your LED neon strips, enhancing both aesthetics and functionality.
Product and Package with Your Brand
You can either send us your logo and color box design, or we make the design for you in China. After your confirmation, we will print them on the strips and packages.
Everything Answered: Guide to the Most Common Queries About Top Bend LED Neon Strips
What Exactly are Top Bend LED Neon Strips?
Top Bend LED Neon Strips are innovative lighting solutions that combine traditional neon lights’ classic look with LED technology’s efficiency and flexibility. These strips are designed to bend effortlessly, allowing for creative and dynamic lighting designs. Unlike traditional neon, they are more energy-efficient and durable and offer a range of colors and brightness levels. Ideal for both commercial and residential use, they can add a vibrant touch to any space while being cost-effective and environmentally friendly.
Can I Cut Top Bend LED Neon Strips to Size?
Absolutely! Top Bend LED Neon Strips are designed for easy customization. You can cut them at designated cut marks, indicated by scissors symbols or black lines visible through the strip’s transparent window. Cutting at these specific points ensures you don’t damage the internal PCB (Printed Circuit Board), which is crucial for the strip’s functionality. Cutting elsewhere can lead to segment failure, so always look for these marks for hassle-free customization.
Are Top Bend LED Neon Strips Waterproof?
Yes, Top Bend LED Neon Strips come with various levels of water resistance. Depending on the model, they can range from splash-resistant (IP65) to fully waterproof (IP68). This makes them perfect for outdoor use or in damp environments like kitchens and bathrooms. When selecting your LED Neon Strip, consider the IP rating to ensure it meets your water and dust resistance needs.
How Do I Connect Two Sections of Top Bend LED Neon Strip?
Joining two sections of Top Bend LED Neon Strip is a straightforward process. You’ll typically use designated connectors that ensure a secure and seamless connection. These connectors are designed to maintain the strip’s integrity and performance while making the installation user-friendly. Ensure the connectors and the strips are aligned correctly to avoid electrical issues.
What Powers Top Bend LED Neon Strips?
Top Bend LED Neon Strips are powered by electricity and require a compatible power supply unit. They usually operate on low-voltage power (commonly 12V or 24V), which makes them energy-efficient and safe for various applications. The power supply converts your home’s standard voltage to a level suitable for the strips. Matching the strip’s voltage requirements with the power supply is crucial to ensure optimal performance and safety.
What is the Lifespan of Top Bend LED Neon Strips?
Top Bend LED Neon Strips are known for their longevity. On average, they can last up to 50,000 hours or more, depending on usage and environmental factors. This durability is significantly higher than traditional lighting solutions, making them cost-effective and low-maintenance long-term use options.
Are Top Bend LED Neon Strips Eco-Friendly?
Yes, Top Bend LED Neon Strips are more environmentally friendly than traditional neon lighting. They consume less energy, have a longer lifespan, and don’t contain harmful gases like mercury, often found in conventional neon tubes. This makes them a greener, more sustainable lighting choice, reducing energy costs and environmental impact.
How Do Top Bend LED Neon Strips Compare to Traditional Neon Lights?
Top Bend LED Neon Strips offer several advantages over traditional neon lights. They are more energy-efficient, durable, and safer, with a lower voltage operation. LED strips are also more versatile in design and installation, as they can bend and be cut to size. Moreover, they provide a more comprehensive range of colors and dimming options, making them suitable for various settings.
How do you install Top Bend LED Neon Strips?
Installing Top Bend LED Neon Strips is relatively simple. First, plan the layout and measure where you want to install the strips. Clean the surface to ensure it’s free of dust and debris. If using adhesive backing, peel and stick the strips in place, or use mounting clips for a more secure fit. Connect the strips to a compatible power supply, and ensure all connections are tight and waterproof if necessary. Always follow the manufacturer’s guidelines for the best results.
Connecting Top Bend LED Neon Strips to a Power Supply: How-To?
Connecting Top Bend LED Neon Strips to a power supply is a critical step in installation. First, identify the voltage requirement of your LED strips. Use a power supply that matches this voltage. Connect the strip’s input wires to the power supply’s output terminals, ensuring correct polarity (positive to positive, negative to negative). You might need a higher-capacity power supply or multiple power units for longer runs or multiple strips. Always ensure the total wattage of the strips does not exceed the power supply.
We Love To Hear From You
Get Free Quote
Send us an email at [email protected] or fill in the below form. We will quote you within 12 hours.
Talk To An Expert
Send us an email at [email protected] or fill in the below form. We will reply within 12 hours.


